Call us at (408)988-3753
Installing the fixed panels of the shower door is the first step in doing the installation. You install the fixed panels first so that you can get an exact match in the height match between the door and the fixed panels. Using "U" channel to secure a fixed panel or a bath screen is one of the simplest and best ways. The edges on the glass are ground & polished into a straight line. When the "U" channel is installed it conforms to the shape of the wall. When the glass is received by the "U" channel a small amount of glass is swallowed by the U channel, so that any wall problems (High tile, bow, or bulg) are hidden. The "U" channel also adds additional adjustment flexibility in setting the door gaps to make the seals work properly. The basic steps in doing the install are outlined below.
- Verify the Layout
- Cutting the U-channel
- Drilling Holes
- Dry Test Fit
- Install U-channel on Tile
- Dry/Wet Glass Install
- Hang the Door
- Final Seal
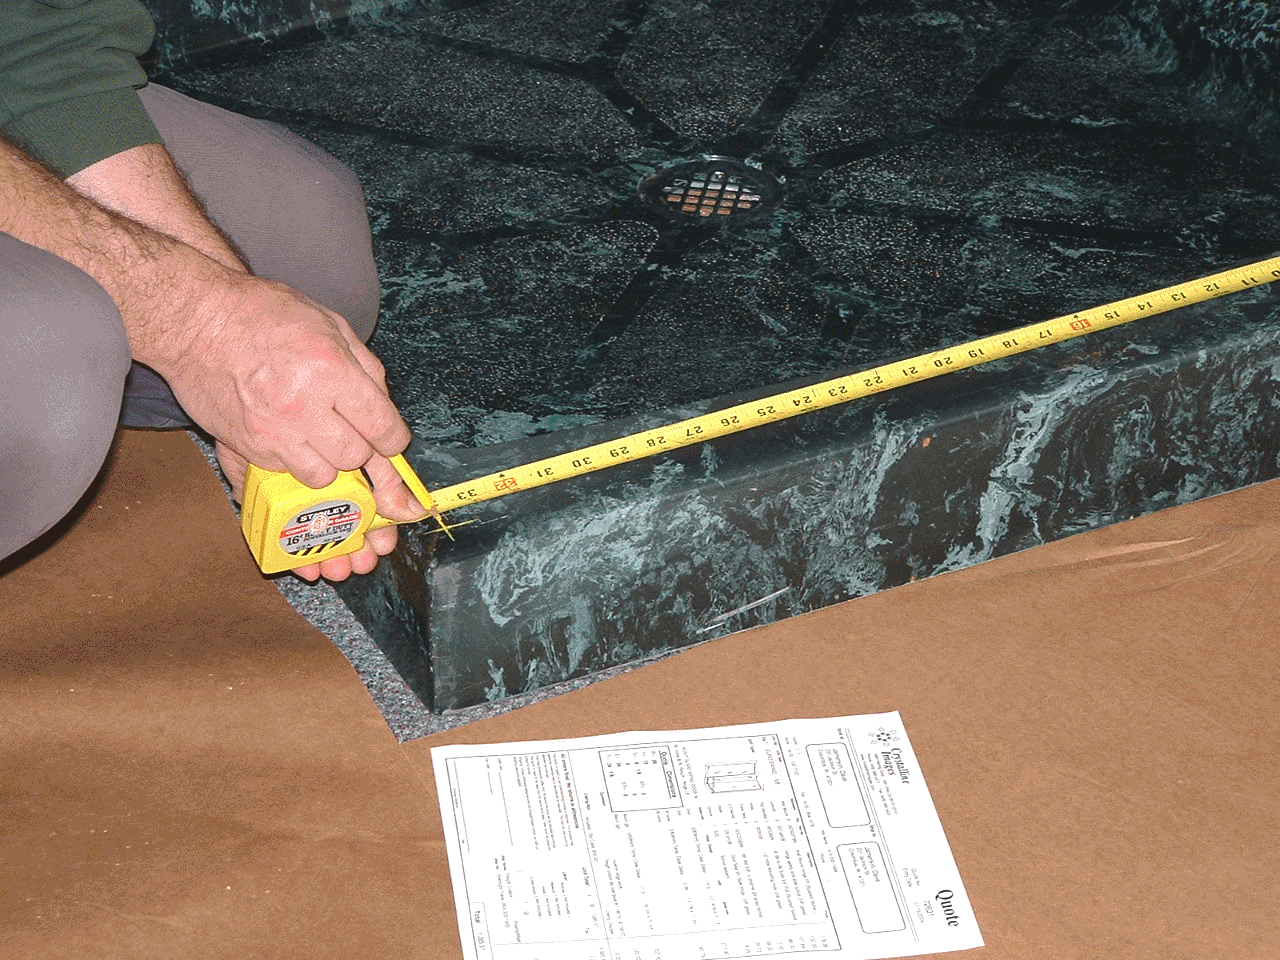
The first step in a install is to verify the layout of the unit. Each glass panel and U-channel were manufactured using "Center-line Measurements". These measurements are the "Space Dimensions" on your paperwork. If you didn't do the measurements, or you don't have the original marks on the tile from the measure, don't start the install until you layout the unit. The U-channel has been manufactured to fit the Space Dimensions. You shouldn't need to cut the bottom pieces of U-channel. In some situations you may need to trim the height of the vertical pieces of U-channel to match the glass height of the glass. Put small marks on the tile to indicate the centerline of the glass. Generally the unit should be installed in the center of the curb. Remember you can't make the glass smaller, and you can't stretch it. The shower door needs to be installed in the location where the original measurements were taken.
Dimension Box Key (S-1 thru S-6)
- W - Door Space
- S - Left Panel
- SR - Left Panel Riser
- K - Right Panel
- KR - Right Panel Riser
- E - Return Panel
- ER - Return Riser
- T - Front total
Our U-channel installation kits come with the U-channel pre-cut to fit the space measurement provided. All the miters are cut , so there shouldn't be any tricky chop saw work required. In some cases you may will need to trim the length of the vertical U-channel to match the glass height. We design for the use of a 1/8" setting block in the bottom channels. The U-Channel kits have several sizes of setting blocks. This allows the installer to adjust the setting block thickness to make the panels stand like they should. Before you start drilling holes, position the "U" channel over your measurement marks and verify the fit. Sometimes it is necessary to use a metal file to fine-tune the angles. If you are working with stock lengths, or need to trim a channel, they can be cut using a chop saw with a carbide blade. Spray the blade with WD40 before you make the cut. Sand or file the ends to remove any saw marks.
Note: If you are installing a shower with a header system, the vertical U-channels will need to be cut so that the top end is 3/4" below the top of the glass. Unfortunately we can't pre-cut the side U-channels because we don't know which setting blocks will be used to achieve the correct door space at the bottom and top. You will need to determine the correct length by doing a dry-fit of the side panels.
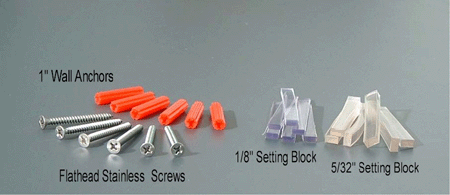
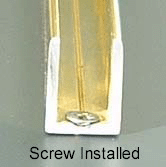
The U-channel kits are not pre-drilled. Generally people will place the anchors in the tile grout lines. The kit is shipped with #6 x 1 1/4" counter sunk stainless steel screws and anchors. With the U-channel in place mark the location of the holes inside the U-channel. Do Not use oils or lubricants in drilling the holes in the U channel. If you get the oils on the inside of the channel the Silicone will not adhere like it should. It is important that when the screws are installed that the head of the screws are flushwith the inside surface of the U-channel. A 15/64" high speed metal drill bit is provided for drilling the U-channel metal. A 3/16" masonry drill bit is provided to drill the holes in the tile or granite. There should be a 3/16" masonry bit included in you installation kit. These drill bits are also available at Home Depot or Lowe's. The holes should be at least 1 1/4 inches deep. Insert the white anchors so that they are flush with the surface of the tile.
 |
 |
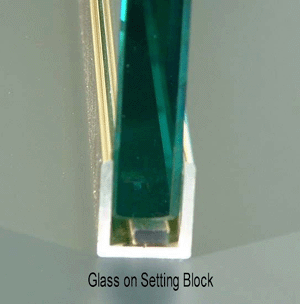
An important step which is often skipped is to do a "Dry Test Fit of the fixed panels. What you want to accomplish is to determine what thickness setting blocks should be used to make the fixed panels stand correctly. The vertical edges should be plumb, the top edges should match up, and most importantly the door space ( W ) is correct. The unit was designed for an 1/8" space between the glass edge and the bottom of the U-channel. The installation kit has several different thickness setting block so that you can adjust their thickness to make the door stand correctly. There is a tube of super-glue in the installation kit. Start by gluing the 1/8" setting blocks into the bottom U-channels. The setting blocks can be cut in half if needed. Nothing goes into the vertical U-channels. Adjust the U-channel thickness untill you have the correct combination to make the panels stand correctly. The door space must equal the "W" dimension.
First make sure your tile surface and the U channel are clean and dry. Don't just sprints on some windex and wipe it off. This surface will still have moisture, and the strength of the silicone will be greatly compromised. We like using Sparkle. It will take off most anything on the surface without scratching. Wipe the surface clean. Put a small bead of silicone on the back side of the U channel to add structural strength to the installation and a small amount of silicone on the top of each anchor to seal the screw hole. Place the U channel in position and install the screws. Wipe off any silicone which might squish out from under the U channel. Inspect each screw to make sure it is flush with the bottom of the U channel.
Note: If your shower will have a header system please read "Installation of Fixed Panel" before you apply silicone to anything.
There are several thickness setting blocks in the U channel installation kit. Your door was manufactured to have the 1/8" used under the glass. The other thickness block are provided to give you the ability to shim the panel if you find that it is not standing straight when you install the glass. Normally you only need two blocks under each panel. The blocks can be cut in half if necessary.
Tip: Some installers will use a little super glue to position the setting blocks so that they don't move during the installation process. If you need to remove a fixed panel for some reason the setting blocks tend to stick to the bottom of the glass, and can get easily lost.

There are two types of U channel installations. There is the Wet Set, which is when you put silicone inside the U channel and then the glass is set into the silicone. On a Dry Set panel you don't have silicone inside the channel. The glass is held in position by the silicone which is applied to seal the panel. A wet set install is required for strength if you plan to hinge the door off of the panel. Some installers will wet set everything, others will only do it when needed.
If installing a shower with a header please read
The primary reason for doing a wet-set installation is to end up with a secure panel which is capable of supporting the weight of a door. As in any gluing operation you need to have all surfaces CLEAN & DRY . Before you get out the silicone you need to verify that you have the correct setting blocks, and that the glass stands correctly in the channel. The glass and U channel have been sized so that there should be a 1/8" space between the glass and the bottom of the U channel. This allows for the unexpected high tile and other surprises. The goal in setting the panel next to the door is to have the correct door "W" value at the bottom, and edge of the glass nearest the door needs to be plumb. If the panels isn't standing plumb you need to remove it and change the setting blocks under the panel. When it all looks good remove the glass, make sure the setting blocks stay in the channel. You may want to use some super glue to make sure they don't slide around when you put the silicone in the channel. To do the next step you want to have a roll of paper towels, a trash can, masking tape and Windex close at hand. The trick here is to put in the correct amount of silicone in the channel. The channel is too tight on the glass to put extra silicone in the channel and expect the excess to ooze out. To much and you can make a mess, to little and and you don't get the strength you need. You only need to put a bead of silicone in the bottom of the U channel large enough so that it makes good contact with the glass.
First make sure your tile surface and the U channel are clean and dry. Don't just sprints on some windex and wipe it off. This surface will still have moisture, and the strength of the silicone will be greatly compromised. We like using Sparkle. It will take off most anything on the surface without scratching. Wipe the surface clean. Put a small bead of silicone on the back side of the U channel to add structural strength to the installation and a small amount of silicone on the top of each anchor to seal the screw hole. Place the U channel in position and install the screws. Important: Wipe off any silicone which might squish out from under the U channel. Inspect each screw to make sure it is flush with the bottom of the U channel.
Tip: Warm up the silicone by letting it set in the sun for about an hour. It will flow better. Put about 10 inches of silicone in the channel on top of each screw heads. The empty space between the patches of silicone will allow the silicone to squish out. You will be able to see the silicone contact the glass as you set the glass in the channel by looking through the glass. If you put to much silicone in the channel the panel will float in the silicone making it hard to reach the correct "W" value. Install the panel and push it into the silicone until you have the correct W value for the door.
Secure The Panel: With the panel in the correct position put a strip of masking tape so it is half on the glass and half on the U channel. Standing on a step-stool force some silicone down the space between the U channel and the glass. Verify the "W" value and that the panel is plumb one final time before you leave it to cure. It takes several days for the silicone to cure to full strength. We recommend you wait 7 days before you hang the door. Do Not adjust the panel position after the cure cycle has started. Disturbing the silicone bond half way through the cure process will reduce the strength. Seal the Wet Set panels the same way you would seal a Dry Set panel (See below).
A Dry-set U channel install is the easiest and cleanest type of fixed panel installation. If the door is not hung off the fixed panel you can install the fixed panel as a Dry-set panel. You install the U channel to the tile the same way for both Wet Set and Dry-set installations. On the Dry-set you put your setting block in the channel so that the glass is not setting on the metal, and then put the panel in place. There is no silicone inside the the channel (Dry-set). With this type of install you can make minor adjustment to the panel after your door is installed. With the panel just setting in the channel it will probably rattle. Don't worry about this because the final seal will make everything solid. After everything is perfect you want to seal the fixed panels as shown below. Make sure that the glass, tile and U channel are clean and dry. If you are sealing the panels with clear silicone (recommended) you will be able to see anything you cover up. Remember that silicone will not stick to anything that is wet.
Step 1
Seal the glass to the U channel both on the inside and outside of each panel. Do one run at a time. If you try to silicone everything at once you will find that the silicone will start to get a scum on its surface making it hard to smooth it with you finger and end up with a clean look.
Step 2
Now smooth the Silicone with a wet finger. If you put on the right amount of silicone you will just be reshaping the bead and pushing a little silicone into the crack. Inspect your silicone to see if you might have missed any spots. If necessary add a little more silicone right where you need it and reshape again.
Step 3
Seal the glass to the U channel both on the inside and outside of each panel. Do one run at a time. If you try to silicone everything at once you will find that the silicone will start to get a scum on its surface making it hard to smooth it with you finger and end up with a clean look.
Step 4
Smooth the silicone with a wet finger. If you put on the right amount of silicone you will just be reshaping the bead and pushing a little silicone into the crack. If you start pushing a glob of silicone with your finger take off the excess and continue with the smoothing. Inspect your silicone to see if you might have missed any spots. You will need to get your head close to the tile surface to see if you have any gaps in the silicone. Sometimes the grout lines will end up with small gaps. If necessary add a little more silicone right where you need it and reshape again. Give the silicone 24 hours to cure before you use the shower.


